
In December I had met a fellow blogger in Delhi and while out for a coffee, I ordered a Kombucha out of curiosity. To my amazement, I fell in love with the beverage and googled it to see what it really is. Kombucha is basically fermented black tea which needs a SCOBY or a Symbiotic Colony of Bacteria and Yeast that aids the fermentation. Store bought Kombucha is very expensive and so I decided to try and brew it at home.
First thing first, I needed a SCOBY and so I went up and looked up several videos and recipes online. There is a tonne of information on this topic, but everyone mentions the trial and error involved in making a SCOBY. So be prepared for some heartbreaks in the process.
I started the SCOBY batch on 20th December 2019 but could only harvest it by 13th March 2020 as I was traveling. Technically a SCOBY should be ready in a month’s time, given optimum temperatures.
Intrigued? Pin it for later!
Kombucha
Kombucha is basically fermented sweet black tea which can be infused with fruits, herbs, spices to give it unique flavorings. The liquid is slightly alcoholic and becomes carbonated in texture, which gives it a great taste. The sugar in the tea is fermented by the SCOBY which converts the sweet tea to a not so sweet mix. Kombucha is a great source of pro-biotic organisms and is promoted the world over for this quality.
SCOBY
A SCOBY is also called a mushroom due to it blob like appearance but is not really one. Its a culture of live organisms that thrive on sugar and need that to get the fermentation process started. It is quite gross in appearance and one is challenged to handle is without any queasiness. But in reality its a healthy sphere of live and useful organisms.
One can purchase a SCOBY online, get one from someone brewing Kombucha at home or simply grow one with some patience.
Grow a SCOBY at home
I followed this basic simple recipe to grow my SCOBY at home and sharing it with my experiences of growing it. I had started the batch on 20th December 2019 but realized that it was quite cold for the SCOBY to grow. The brew needs optimum temperatures of 20 -25 degree Celsius to grow the culture. So I wrapped a muffler around the jar and left it for a month. Around 20th January 2020, I could see a thin disc floating on top of the liquid but it was nowhere near the required thickness of 1/4th of an inch. So I left it alone for some more time and finally harvested it on 13th March 2020. ( I was traveling for a month and that delayed the harvest)
Ingredients:
1 clean, sterile glass jar with a wide mouth
Thin muslin cloth like an old dupatta/dhoti or good old cotton napkin
7 cups of filtered water
1/2 cup granulated white sugar ( raw sugar/ cane sugar are other options if you want to go organic)
4 bags of Black tea or 2 tbspns of loose black tea (very important)
1 cup or 200 ml of store bought unflavored, unpasteurized Kombucha (will act as a starter)

Method:
Bring the water to a boil and add the sugar to it, stirring to dissolve it completely. Then turn off the gas and put in the tea bags. Cover and brew for as long as you do to make a strong cup of tea as per your liking. Take out the tea bags and allow the liquid to cool down to room temperature.
Sterilize the glass jar as well as you can with hot water and completely dry it. Ensure you don’t handle it with dirty hands at all. Once the jar is cool to touch, pour the cooled down sweet tea into it.
Add the store bought Kombucha and then tie the muslin cloth on the mouth tightly. Make sure nothing get get through the cloth other than air. Fruit flies and other bugs love this mix, so the cloth needs to be tightly woven but light enough to allow air to pass through.
Place this jar in a cool, dark space where it will not get even one speck of sunlight. I actually put it away in one of my kitchen cupboards. Just make sure that there is proper ventilation in the cupboard or else this brew will rot. The mix needs oxygen to build the fermentation process. That’s why no lid on the jar.
Ideally, you will start to see small white bubbles collecting on the surface of the liquid in a few days time, which tells you that fermentation has begun. In a week or so, a very thin white coating will form and gradually this will thicken to a disc in about 3-4 weeks.
The SCOBY needs to be 1/4th of an inch thick before it can be used to brew a Kombucha batch, so be patient during this process.

Tips:
- You need to be anal about cleanliness while making Kombucha/SCOBY at home
- Sterilize all equipment and don’t put dirty spoons into the tea mix
- Use fresh and clean equipment for every step
- Keep the tea covered while brewing and during cool down process
- Use only black tea to brew the SCOBY/ Kombucha
- The mouth of the jar needs to be covered tightly so that no bugs can get in
- The bubbles in the brew indicate the presence of CO2 which means fermentation has started
- The culture may look grotesque and scary at first, have faith and patience
- Make sure the liquid is completely cooled down before adding the store bought Kombucha. Or else the starter Kombucha will die if the mix is too warm
- Store bought Kombucha may have some stringy stuff at the bottom which is actually bits of yeast and great to aid the process
- Dont use plastic or metal containers to brew Kombucha or to grow the SCOBY
- Every time the SCOBY is put back into a fresh batch, a new layer will start to form on the existing one. The two might separate of stay single
How to check the SCOBY
Initially there will be white spore like formation on the surface and you might be tempted to think its gone bad. Have some patience and faith to allow it to ferment some more. In the beginning the layer is not even and its only when it thickens that it gets a creamy texture. So use some discretion and judgement before completely discarding it.
Sometimes it will sink to the bottom or slide sideways and just hang there with some threads wafting around it. Dont worry, its just the SCOBY living it up out there 😉
If you are able to tear the SCOBY with your hand, its not strong enough to brew a Kombucha and needs to thicken some more.
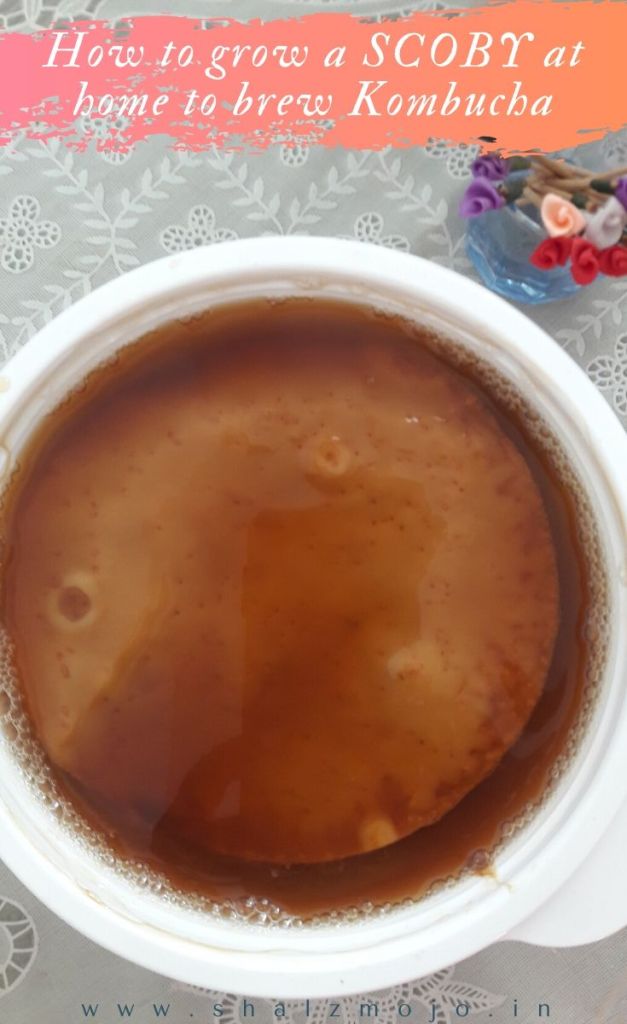
This look happens when a new SCOBY is forming. Gradually the bumpy bits will disappear and a creamy texture will emerge. Notice the bubbles in the jar, just around the edges of the SCOBY. This is the fermentation in process.
Signs that the SCOBY has lost the plot
Its very difficult to kill the SCOBY unless you freeze it or put it in boiling hot water. Both cases, the bacterial and yeast activities will cease. But it can develop some infections due to dehydration or some sort of contamination.
- A blackish fuzz like formation on the surface is bad news
- Blue green patches which might indicate algae or some other contamination
- Whitish mold like growth means the SCOBY has gone bad
- Black or brown streaks on the SCOBY does not mean its gone bad- these could be the marks of the fermented tea
- Touch the SCOBY if the patches look scary to you and you will be able to tell if its mold or any other kind of infection.
Well there you have it. In just about a month, you will be able to harvest the SCOBY and get started on brewing your first batch of Kombucha. Stay tuned as that is going to be the next post in the series.
I am ready to hand hold and help you make your SCOBY, so do leave your questions/feedback in the comment section and I will get back to you. I am also going to start a WA group to take the questions and if you wish to be added, you could email at shalzmojo@gmail.com with your phone number and name.
Happy brewing and all the best of luck!
Disclaimer: I am an amateur who is into brewing Kombucha at home as a hobby. All the tips are based on my experience but I do not claim to be an expert on the topic.
| Twitter | Pinterest | Facebook | Goodreads | Instagram |
⇐ Interested in more DIY? Check out how to make Bio Enzyme at home in 4 easy steps⇒

Safe to say that I am not going to try this one by myself.
Ha ha I know Damyanti- this seems a little daunting. But the tea is awesome. I am in love with it and cant afford to buy it as its quite expensive. So fermenting it at home is my safe best for a regular supply.
I think I told you that my mother in law got back the starter mushroom all the way from America in the US. She brought it so carefully and when she began the culture at home, it was placed in a quiet place which we had to respect like her devghar . And she gave the new ones to people who promised to respect it and take good care of it.
Then one fine day she found out it had a large alcohol content and suddenly decided it was bad so she threw it out!!!
Yeah I had read that and was wondering at that time. But now it makes sense as this explanation has all the details. It doesnt have a large alcohol content – its very very less. But I guess she wouldnt have liked to think she was brewing alcohol. I am just impressed to hear she was culturing it way back in the days.
I am also ready to give out the “precious” to people looking to start a batch at home but I guess with the lock down, this will take time.
I hadn’t even heard of this, much less tried it. So this was a fascinating read. But I’m not sure if I’m ready for this kind of trial and error at the moment. :/ Maybe after quarantine.
Yeah I guess you cant start right now as you would need a starter Kombucha bottle. I hope things are normal at your end and you are doing okay Shan.
Ummm…I am not making this. Sorry!
But, kudos to your patience, Shalz! <3
I hear you Shilpa -it can be little grotesque to see and hold. But the taste of Kombucha is just too good for me to resist. Thats why I invested in this. Maybe someday I will make you taste the ones I am brewing 🙂
Yes, maybe someday!
My my, this sounds like a tedious. But I am in awe of your determination and now am so curious about Kombucha. It must have been quite something for you to go through all this effort, Shalz!
Oh please do research it and when you are able to , try it out too. Its a bit expensive in the market and thats why I began to experiment with brewing it at home. I am glad that its turned out well for me so far- fingers crossed.
It takes a lot of patience and effort to grow, harvest and brew the Kombucha. Your post makes it look easy and I laud your passion Shalini. The pictures and step by step approach is very helpful, I am sure.
Oh thats lovely praise Vishal and I thank you for it. It feels good to see this effort being praised and yes its very tedious. I was just fortunate enough to be away for a while when I had started the SCOBY process. When I came back, it was ready and waiting for me.